Carbon Carbon Everywhere
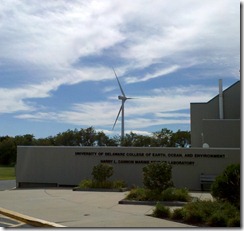
Carbon footprint, carbon emissions, carbon taxes…carbon carbon carbon. That’s all we’re hearing these days. If we do something that implies that we’re using less carbon then voila! We’re suddenly “Going Green”. As a carbon-based life form, I’m quite fond of carbon personally, but the story today is about how to minimize the amount of carbon that we’re responsible for having spewed into the atmosphere and taken up by the oceans. So the thing you need to do to eliminate your carbon footprint as well as the footprint of your neighbors and their neighbors is install a 2 Megawatt Wind Turbine. Problem solved…you are absolved of your carbon sins and you may go in peace.

What’s that you say? You don’t have a 2MW wind turbine in this years budget? Then it’s on to Plan B…well Plan A in my case as I started down this road years ago. Long before we installed the turbine. Even though the end result is a much greener IT infrastructure, that plan was originally geared towards gaining more system flexibility, efficiency and capabilities in our server infrastructure. I’d be lying if I said I started out doing it to “be green”, even though that was an outcome from the transition. (Unless of course I’m filling out a performance appraisal and it’ll give me some bonus points for saying so – in which case I ABSOLUTELY had that as my primary motivator ;?)
One of the things that we do here in the Ocean Information Center is to prototype new information systems. We specialize in creating systems that describe, monitor, catalog and provide pointers to global research projects as well as their data and data products. We research various information technologies and try to build useful systems out of them. In the event that we run into a show stopper with that technology, we sometimes have to revert to another technology that is incompatible with those in use on the server. Whether they be the operating system, the programming language, the framework or the database technologies selected. In these scenarios, it is hugely important to compartmentalize and separate the various systems that you’re using. We can’t have technology decisions for project A causing grief for project B now can we?
One way to separate the information technologies that you’re using is to install them on different servers. That way you can select a server operating system and affiliated development technologies that play well together and that fit all of the requirements of the project as well as its future operators. With a cadre of servers at your disposal, you can experiment to your hearts content without impacting the other projects that you’re working with. So a great idea is to buy one or more servers that are dedicated to each project…which would be wonderful except servers are EXPENSIVE. The hardware itself is expensive, typically costing thousands of dollars for each server. The space that is set aside to house the servers is expensive – buildings and floor space ain’t cheap. The air conditioners that are needed to keep them from overheating is expensive (my rule of thumb is that if you can stand the temperature of the room, then the computers can). And lastly the power to run each server is expensive – both in direct costs to the business for electricity used and in the “carbon costs” that generating said electricity introduce. I was literally run out of my last lab by the heat that was being put out by the various servers. It was always in excess of 90 F in the lab, especially in the winter when there was no air conditioners running. So my only option was to set up shop in a teeny tiny room next to the lab. Something had to give.
We Don’t Need No Stinkin’ Servers (well, maybe a few)
A few years ago I did some research on various server virtualization technologies and, since we were running mostly Windows-based servers at the time, I started using Microsoft’s Virtual Server 2005. Pretty much the only other competitor at the time was VMWare’s offerings. I won’t bore you with the sales pitch of “most servers usually only tap 20% or so of the CPU cycles on the system” in all its statistical variations, but the ability to create multiple “virtual machines” or VMs on one physical server came to the rescue. I was able to create many “virtual servers” for each physical server that I had now. Of course, to do this, you had to spend a tad more for extra memory, hard drive capacity and maybe an extra processor; but the overall cost to host multiple servers for the cost of one physical box (albeit slightly amped up) were much less now. To run Virtual Server 2005, you needed to run Windows Server 2003 64-bit edition so that you could access > 4Gigs of RAM. You wanted a base amount of memory for the physical server’s operating system to use, and you needed some extra RAM to divvy up amongst however many virtual servers you had running on the box. Virtual Server was kind of cool in that you could run multiple virtual servers, each in their own Internet Explorer window. While that worked okay, a cool tool came on the scene that helped you manage multiple Virtual Server 2005 “machines” with an easier administrative interface. It was called “Virtual Machine Remote Control Client Plus”. Virtual Server 2005 served our needs just fine, but eventually a new Windows Server product line hit the streets and Windows Server 2008 was released to manufacturing (RTM) and shipping on the new servers.
Enter Hyper-V
A few months after Windows Server 2008 came out, a new server virtualization technology was introduced called “Hyper-V”. I say a “few months after” because only a Beta version of Hyper-V was included in the box when Windows Server 2008 rolled off the assembly line. A few months after it RTM’d though, you could download an installer that would plug in the RTM version of it. Hyper-V was a “Role” that you could easily add to a base Win2k8 Server install that allowed you to install virtual machines on the box. We tinkered around with installing the Hyper-V role on top of a “Server Core” (a stripped-down meat and potatoes version of Win2k8 Server) but we kept running into road blocks in what functionality and control was exposed so we opted to install the role under the “Full Install” of Win2k8. You get a minor performance hit doing so, but nothing that I think I notice. A new and improved version came out recently with Windows Server 2008 R2 that added some other bells and whistles to the mix.
The advantages of going to server virtualization were many. Since I needed fewer servers they were:
- Less Power Used – fewer physical boxes meant lower power needs
- Lower Cooling Requirements – fewer boxes generating heat meant lower HVAC load
- Less Space – Floor space is expensive, fewer servers require fewer racks and thus less space
- More Flexibility– Virtual Servers are easy to spin up and roll back to previous states via snapshots
- Better Disaster Recovery – VMs can be easily transported offsite and brought online in case of a disaster
- Legacy Projects Can Stay Alive – Older servers can be decommissioned and legacy servers moved to virtual servers
Most of these advantages are self-evident. I’d like to touch on a little more are the “flexibility”, “disaster recovery” and “Legacy Projects” topics which are very near and dear to my heart.
Flexibility
The first, flexibility, was a much needed feature. I can’t count how many times we’d be prototyping a new feature and then, when we ran into a show-stopper, would have to reset and restore the server from backup tapes. So the sequence would be back up the server, make your changes and then, if they worked, we’d move on to the next state. If they didn’t we might have to restore from backup tapes. All of these are time-consuming and, if you run into a problem with the tape (mechanical systems are definitely failure prone), you were up the creek sans paddle. A cool feature of all modern virtualization technologies is the ability to create a “snapshot” of your virtual machine’s hard drives and cause any future changes to happen to a different linked virtual hard disk. In the event that something bad happens with the system, you simply revert back to the pre-snapshot version (there can be many) and you’re back in business. This means that there is much less risk in making changes (as long as you remember to do a snapshot just prior) – and the snapshotting process takes seconds versus the minutes to hours that a full backup would take on a non-virtualized system.
Another cool feature of snapshots is that they can be leveraged on research vessels. The thought is that you get a virtual machine just the way you want it (whether it’s a server or a workstation). Before you head out on a cruise you take a snapshot of the virtualized machine and let the crew and science parties have their way with it while they’re out. When the ship returns, you pull the data off the virtualized machines and then revert them to their pre-cruise snapshots and you’ve flushed away all of the tweaks that were made on the cruise (as well as any potential malware that was brought onboard) and you’re ready for your next cruise.
Another capability that I’m not able to avail myself of is the use Hyper-V in failover and clustering scenarios. This is pretty much the ability to have multiple Hyper-V servers in a “cluster” where multiple servers are managed as one unit. Using Live Migration, the administrator (or even the system itself based on preset criteria) can “move” virtual machines from Hyper-V server to Hyper-V server. This would be awesome for those times when you want to bring down a physical server for maintenance or upgrades but you don’t want to have to shut down the virtual servers that it hosts. Using clustering, the virtual servers on a particular box can be shuttled over to other servers, which eliminates the impact of taking down a particular box. One of the requirements to do this is a back-end SAN (storage area network) that hosts all of the virtual hard drive files, which is way beyond my current budget. (Note: If you’d like to donate money to buy me one, I’m all for it ;?)
I also use virtualization technologies on the workstation side. Microsoft has their Virtual PC software that you can use to virtualize say an XP workstation OS on your desktop or laptop for testing and development. Or maybe you want to test your app against a 32-bit OS but your desktop or laptop is running a 64-bit OS? No worries, virtualization to the rescue. The main problem with Virtual PC is that it’s pretty much Windows-only and it doesn’t support 64-bit operating systems, so trying to virtualize a Windows 2008 R2 instance to kick the tires on it is a non-starter. Enter Sun’s…errr…Oracle’s Virtual Box to the rescue. It not only supports 32 and 64-bit guests, but it also supports Windows XP, Vista and 7 as well as multiple incarnations of Linux, DOS and even Mac OS-X (server only).
What does “support” mean? Usually it means that the host machine has special drivers that can be installed on the client computer to get the best performance under the virtualization platform of choice. These “Guest Additions” usually improve performance but they also handle things like seamless mouse and graphics integration between the host operating system and the guest virtual machine screens. Guest operating systems that are not “supported” typically end up using virtualized legacy hardware, which tends to slow down their performance. So if you want to kick the tires on a particular operating system but don’t want to pave your laptop or desktop to do so, virtualization is the way to go in many cases.
The use cases are endless, so I’ll stop there and let you think of other useful scenarios for this feature.
Disaster Recovery
Disasters are not restricted to natural catastrophes. A disaster is certainly a fire, earthquake, tornado, hurricane, etc. but it can also be as simple as a power spike that fries your physical server or a multi-hard drive failure that takes the server down. In the bad-old-days (pre VM) if your server fried, you hoped that you could find the same hardware as what was installed on the original system so that you could just restore from a backup tape and not be hassled by new hardware and its respective drivers. If you were unlucky enough to not get an exact hardware match, you could end up spending many hours or days performing surgery on the hardware drivers and registry to get things back in working order. The cool thing about virtualized hardware is that the virtual network cards, video cards, device drivers, etc. that are presented to the virtual machine running on the box were pretty much the same across the board. This means that if one of my servers goes belly up, or if I want to move my virtual machine over to another computer for any reason, there will be few if any tweaks necessary to get the VM up and running on the new physical box.
Another bonus to this out-of-the-box virtual hardware compatibility is that I can export my virtual machine and its settings to a folder, zip it up and ship it pretty much anywhere to get it back up and online. I use this feature as part of my disaster recovery plan. On a routine basis (monthly at least) I shut down the virtual machine, export the virtual machine settings and its virtual hard drives, and then zip them up and send them offsite. This way if disaster does strike, I have an offsite backup that I can bring online pretty quickly. This also means that I can prototype a virtual server for a given research project and, when my work is complete, hand off the exported VM to the host institutions IT department to spin up under their virtualized infrastructure.
Legacy Projects
I list this as a feature, but others may see this as a curse. There are always those pesky “Projects That Won’t Die”! You or somebody else set them up years ago and they are still deemed valuable and worthy of continuation. Either that or nobody wants to make the call to kill the old server – it could be part of a complex mechanism that’s computing the answer to life, the universe and everything. Shutting it down could cause unknown repercussions in the space-time continuum. The problem is that many hardware warranties only run about 3 years or so. With Moore’s Law in place, even if the physical servers themselves won’t die – they’re probably running at a crawl compared to all of their more recent counterparts. More importantly, the funding for those projects ran out YEARS ago and there just isn’t any money available to purchase new hardware or even parts to keep it going. My experience has been that those old projects, invaluable as they are, require very little CPU power or memory. Moving them over to a virtual server environment will allow you to recycle the old hardware, save power, and help reduce the support time that was needed for “old faithful”.
An easy (and free) way to wiggle away from the physical and into the virtual is via the SysInternals Disk2VHD program. Run it on the old box and in most cases it will crank out files and virtual hard disks (VHDs) that you can mount in your virtual server infrastructure relatively painlessly. I’m about to do this on my last two legacy boxes – wish me luck!
Conclusion
Most of my experience has been with Microsoft’s Hyper-V virtualization technology. A good starter list of virtualization solutions to consider is:
Hopefully my rambling hasn’t put you to sleep. This technology has huge potential to help save time and resources, which is why I got started with it originally. Take some time, research the offerings and make something cool with it!


